If you’re an Apple device user, you may have encountered the frustrating message: “Your network settings prevent content from loading privately.” This error can appear on iPhones, iPads, and Macs, disrupting the loading of content in apps like Mail and Safari that depend on private network connections. This guide will show you how to fix ‘Your Network Settings Prevent Content from Loading Privately’ on your iPhone, iPad, or Mac, so you can restore normal functionality and enjoy uninterrupted browsing.
This comprehensive guide dives deep into practical solutions to fix the problem. Each method is carefully explained with clear steps and helpful context so you can troubleshoot and resolve the issue on your device. Let’s walk through each fix and restore your seamless browsing and app experience.
What Causes the “Network Settings Prevent Content from Loading Privately” Error?
To fix the “Your Network Settings Prevent Content from Loading Privately” error on iPhone, iPad, and Mac, it’s essential to understand how Apple’s privacy and security features can sometimes interfere with network configurations. Apple’s focus on privacy introduces tools like Mail Privacy Protection, iCloud Private Relay, and Limit IP Address Tracking, all aimed at keeping your internet activity secure and anonymous. While these features offer significant privacy benefits, they can also cause conflicts in certain network settings, such as on corporate networks, public Wi-Fi, or when using a VPN.
Now, let’s explore how to resolve this issue and ensure smooth content loading on your Apple devices.
Read more about 9 Quick Ways to Fix Mobile Hotspot Keeps Turning Off on Android
How to Fix ‘Your Network Settings Prevent Content from Loading Privately.’ Problem on iPhone, iPad and Mac
Disable Mail Privacy Protection
Apple introduced Mail Privacy Protection to prevent senders from collecting information about your activity in the Mail app. When enabled, it hides your IP address and blocks email senders from knowing when you’ve opened their email.
While this is great for privacy, it can sometimes prevent emails or embedded content from loading properly.
How to Disable Mail Privacy Protection
On iPhone and iPad:
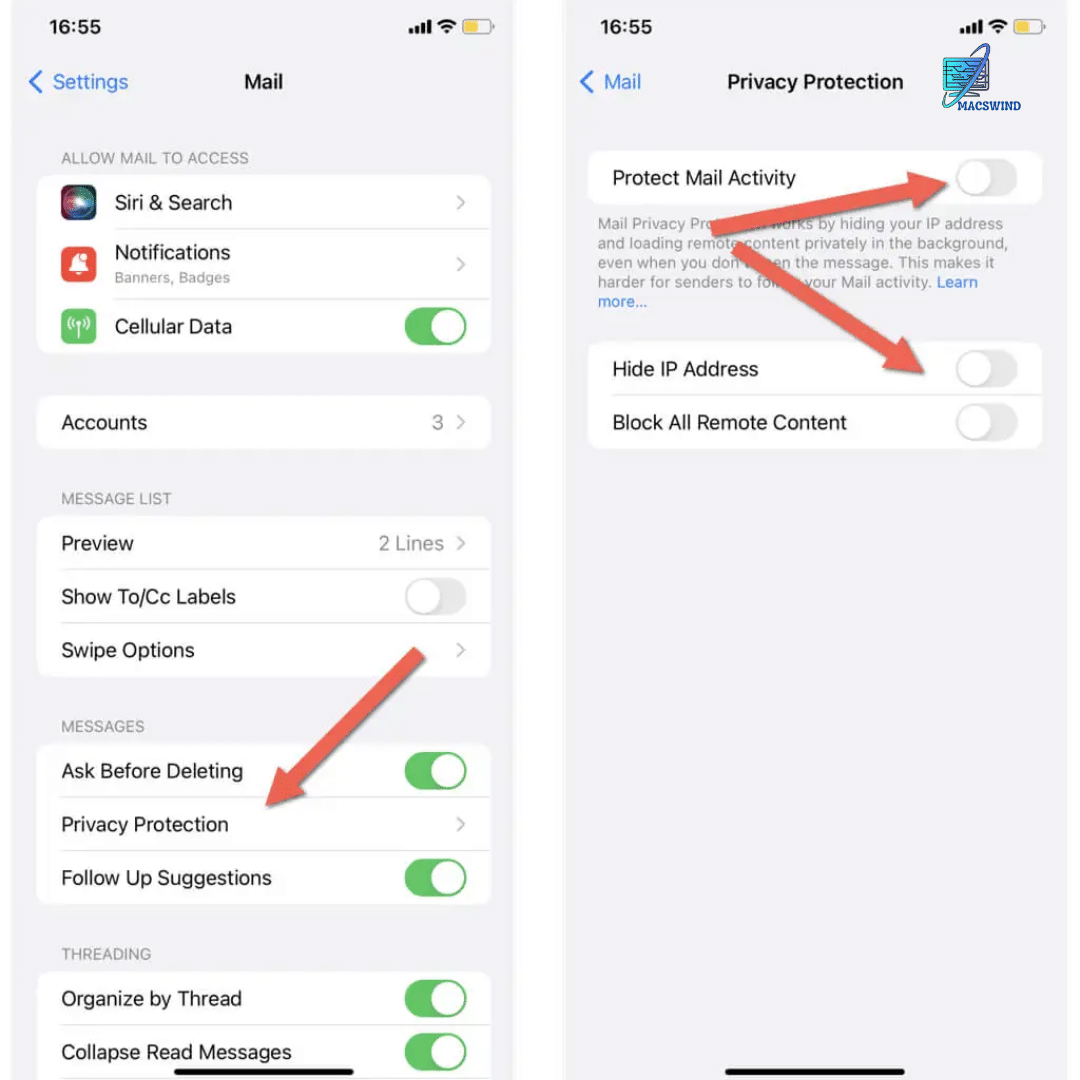
- Open Settings.
- Scroll down and tap Mail.
- Tap Privacy Protection.
- Toggle off Protect Mail Activity.
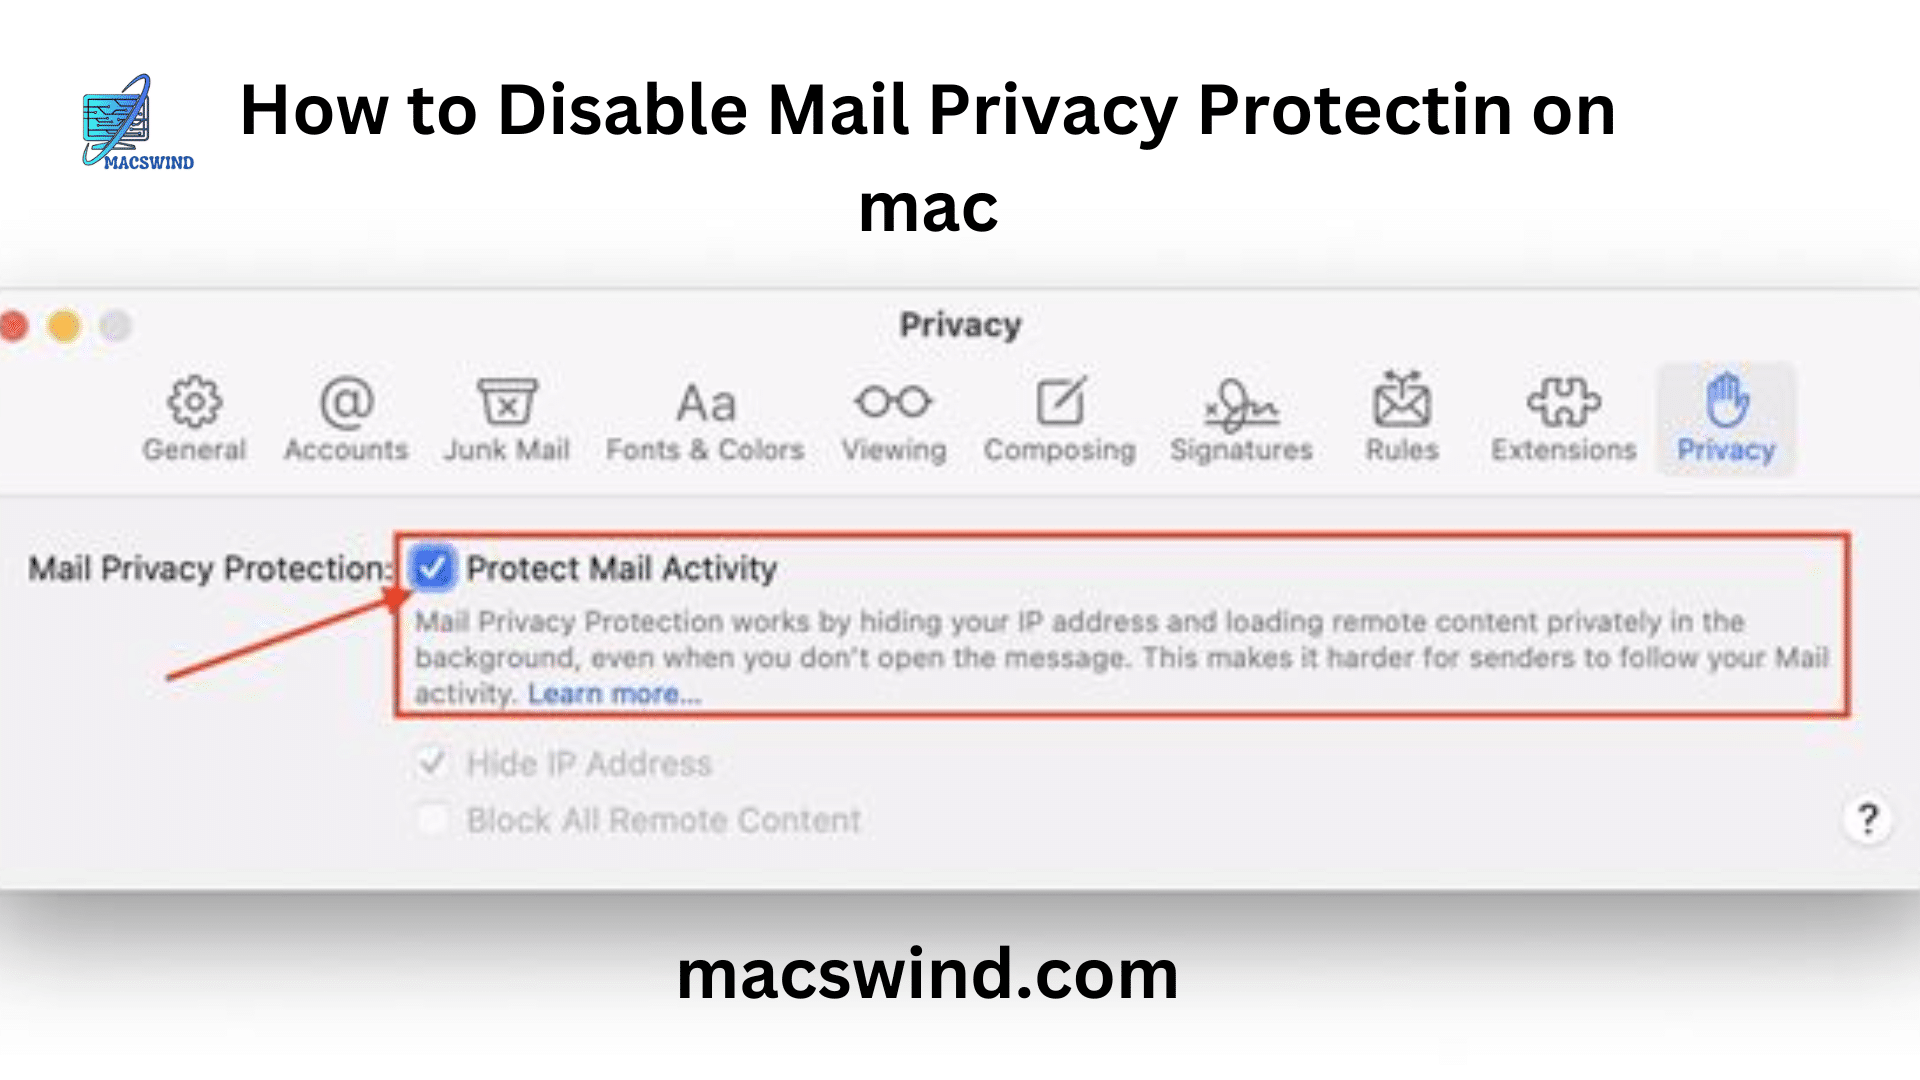
On Mac:
- Open the Mail app.
- Click Mail in the menu bar and select Preferences.
- Click on the Privacy tab.
- Uncheck the box next to Protect Mail Activity.
Impact: Disabling this feature allows email content to load normally but makes your activity more visible to email senders. This trade-off may be necessary if the issue significantly disrupts your email experience.
Read more about How to Fix iPhone Camera Blinking Issue?
Why This Fix Works
By disabling Mail Privacy Protection, your device no longer hides your IP address or blocks certain content from loading within emails. This fix ensures that external content embedded in emails, such as images and links, will load without issues.
Turn Off Limit IP Address Tracking
What Is Limit IP Address Tracking?
Limit IP Address Tracking is a feature in Safari that blocks websites from learning your IP address and using it to track your location. While this enhances privacy, it can sometimes cause issues when accessing websites that rely on location data or IP-based content delivery.
How to Turn Off Limit IP Address Tracking
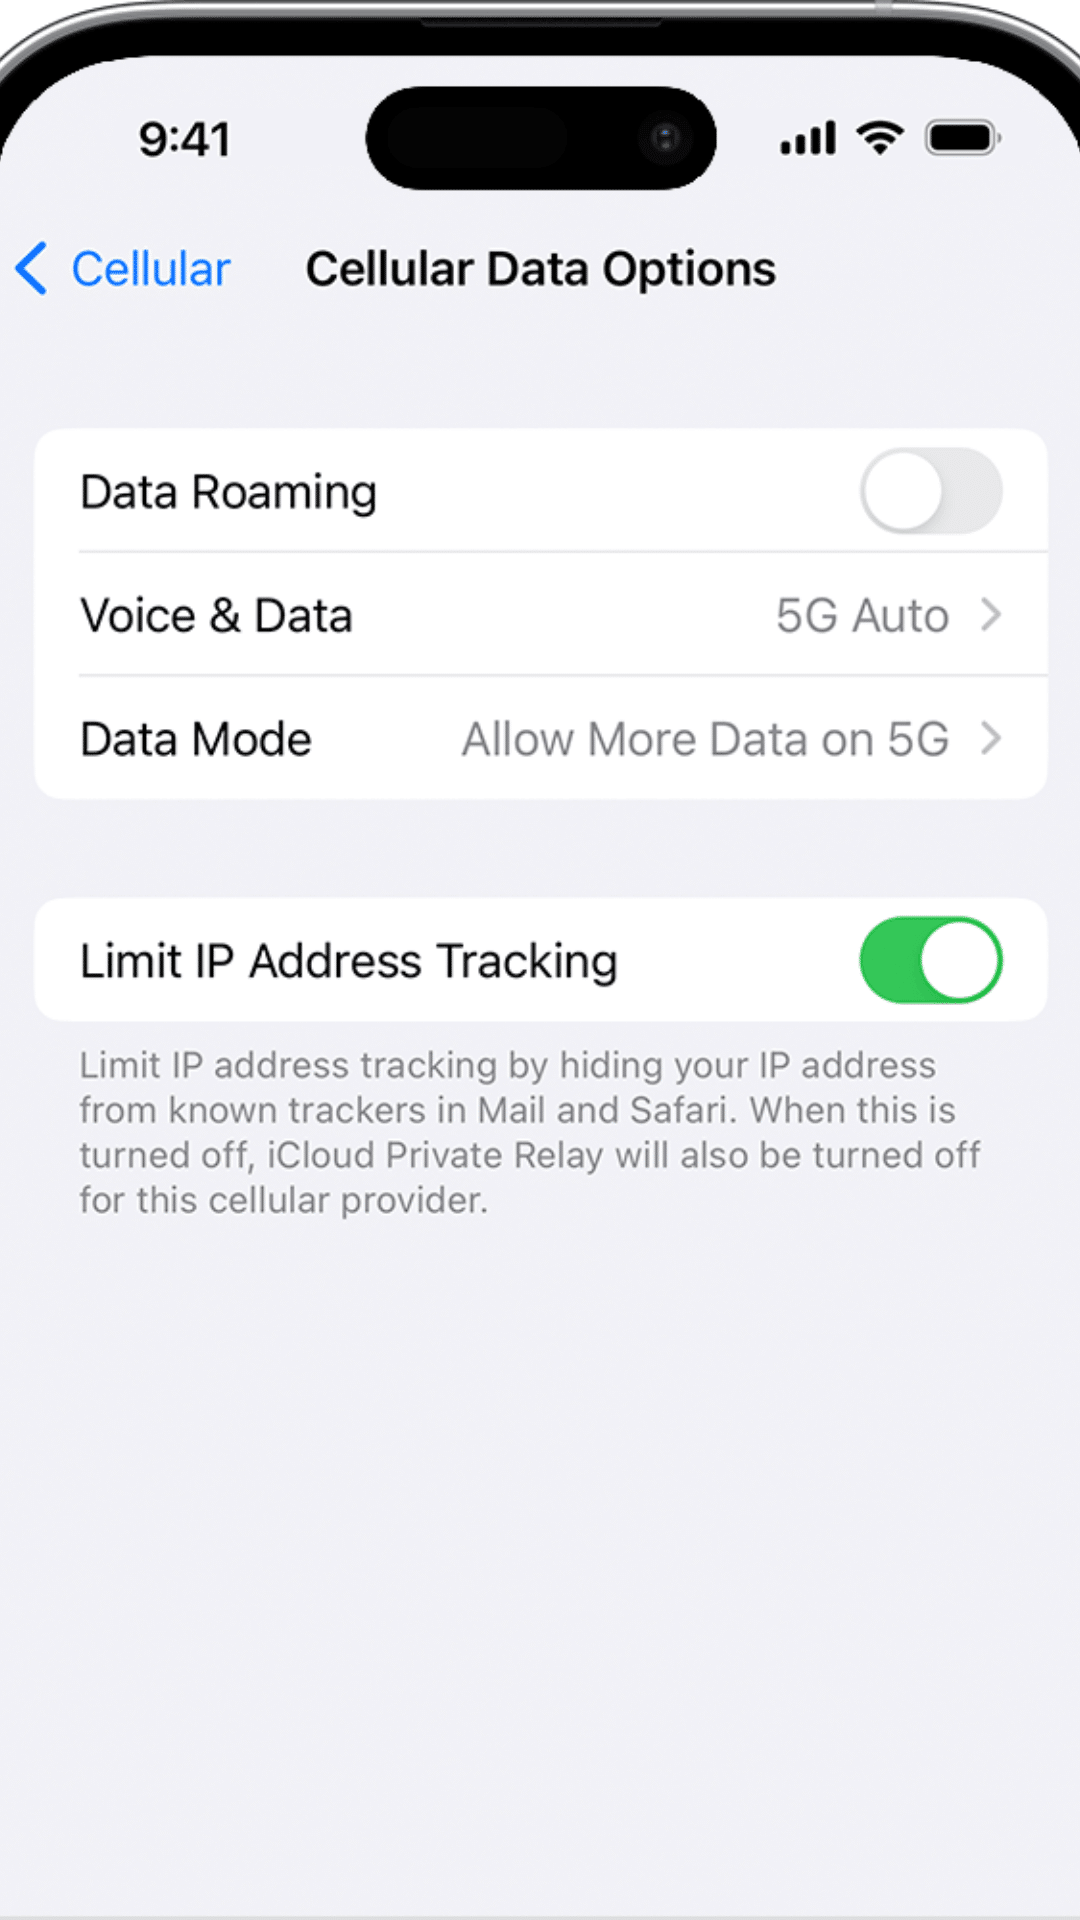
On iPhone and iPad:
- Open Settings.
- Go to Wi-Fi.
- Tap the i icon next to your current Wi-Fi network.
- Toggle off Limit IP Address Tracking.
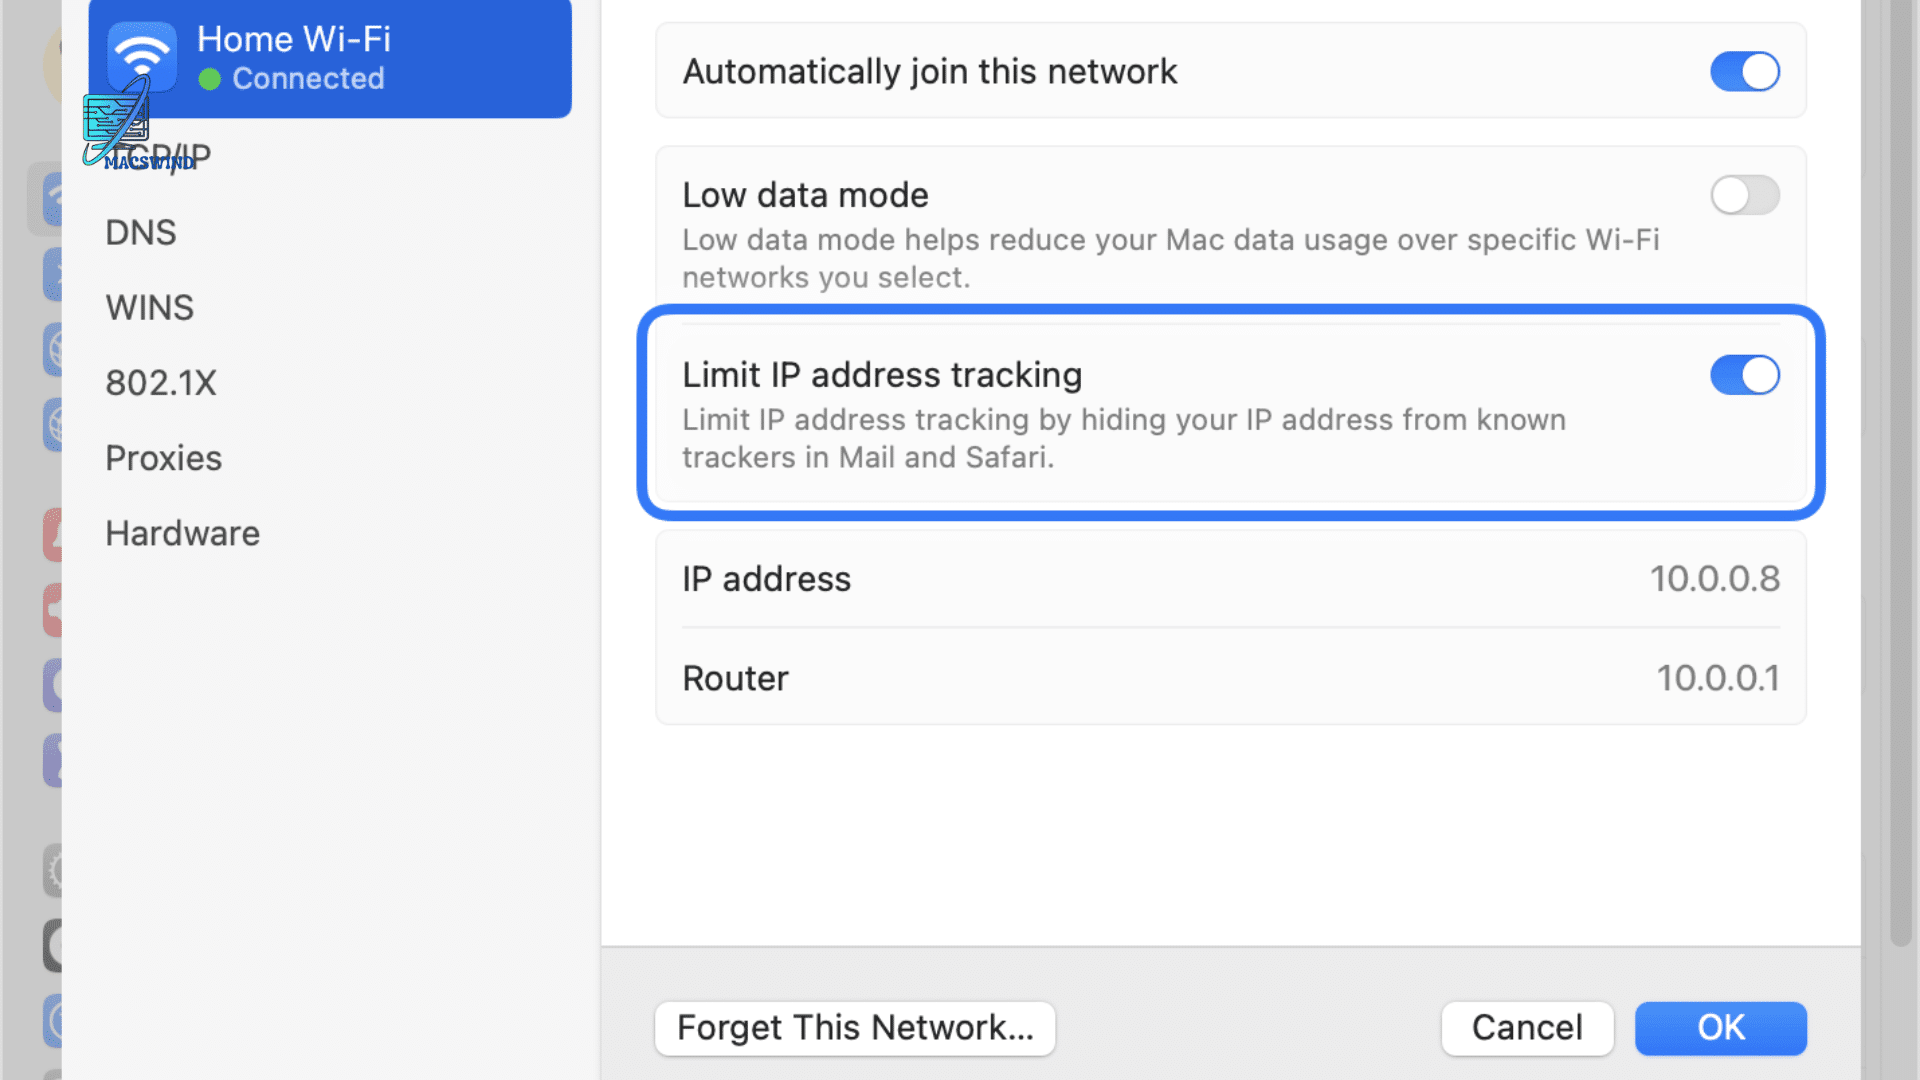
On Mac:
- Open System Preferences.
- Select Network.
- Click on your Wi-Fi network and click the i button.
- Uncheck Limit IP Address Tracking.
Why This Fix Works
By turning off Limit IP Address Tracking, your device allows websites to identify your IP address. This can resolve loading issues, especially for location-based services or certain websites that depend on IP tracking to display regional content.
Impact: This fix reduces privacy protection on specific websites but can resolve conflicts that prevent content from loading.
Disable iCloud Private Relay
What Is iCloud Private Relay?
iCloud Private Relay is one of Apple’s more advanced privacy tools. When enabled, it anonymizes your browsing by routing your traffic through two separate internet relays. This prevents websites from seeing your real IP address, offering enhanced privacy while browsing in Safari.
However, iCloud Private Relay may not work well with all networks, especially corporate or school networks, or certain VPN services.
How to Disable iCloud Private Relay
On iPhone and iPad:
- Open Settings.
- Tap your Apple ID at the top.
- Go to iCloud.
- Tap Private Relay and toggle it off.
On Mac:
- Open System Preferences.
- Click on your Apple ID.
- Select iCloud.
- Toggle off Private Relay.
Why This Fix Works
iCloud Private Relay may block certain types of content or interfere with network connections, especially if you’re on a restricted network or using a VPN. Disabling it can resolve these conflicts, allowing content to load as expected.
Impact: While you lose some anonymity while browsing, this solution can be essential if you’re on a network that conflicts with Private Relay.
Reset Network Settings
Why Reset Network Settings?
Resetting network settings can be a catch-all fix for persistent network-related issues. When you reset these settings, your device forgets all saved Wi-Fi networks, passwords, and VPN configurations. This clears any misconfigurations that could be causing the “Your network settings prevent content from loading privately” error.
How to Reset Network Settings
On iPhone and iPad:
- Open Settings.
- Go to General.
- Scroll down and tap Reset.
- Tap Reset Network Settings and confirm.
On Mac:
Resetting network settings on a Mac requires more technical steps, including using Terminal commands to reset network preferences. Here’s how you can do it:
- Open Terminal.
- Type the following commands to delete old network settings:
sudo rm /Library/Preferences/SystemConfiguration/com.apple.airport.preferences.plist sudo rm /Library/Preferences/SystemConfiguration/com.apple.network.identification.plist sudo rm /Library/Preferences/SystemConfiguration/NetworkInterfaces.plist sudo rm /Library/Preferences/SystemConfiguration/preferences.plist - Restart your Mac and reconnect to your Wi-Fi network.
Why This Fix Works
Resetting the network settings erases any misconfigurations or outdated settings that may be causing connectivity problems. By doing this, you allow the device to establish a fresh connection to networks, potentially resolving the issue.
Impact: You’ll lose all saved Wi-Fi passwords and VPN settings, so be prepared to re-enter them. However, this method often resolves deep network-related issues.
Disable Third-Party VPN or Proxy Connections
How VPNs or Proxies Cause Problems
VPNs and proxy servers can change how your device connects to the internet by routing traffic through an external server. While they’re useful for privacy, accessing geo-restricted content, or bypassing firewalls, they can conflict with Apple’s privacy features, resulting in content not loading properly.
How to Disable VPN or Proxy Connections
On iPhone and iPad:
- Open Settings.
- Go to General and tap VPN.
- Toggle off any active VPN connections.
On Mac:
- Open System Preferences.
- Go to Network.
- Select your VPN from the list and click Disconnect.
Why This Fix Works
Disabling the VPN or proxy allows your device to connect to the internet directly without rerouting through external servers, which could be causing conflicts with Apple’s privacy features.
Impact: You’ll lose any privacy or geo-restriction benefits provided by the VPN, but the trade-off is restoring normal content loading functionality.
Ensure Your iPhone, iPad, or Mac is Up to Date
Why Software Updates Matter
Apple frequently releases updates that include bug fixes, security improvements, and optimizations for device performance. If you’re running outdated software, it could be the source of your problem. Updating to the latest iOS or macOS version might resolve the issue without any additional troubleshooting.
How to Update Your iphone And ipad
On iPhone and iPad:
- Open Settings.
- Go to General and tap Software Update.
- If an update is available, tap Download and Install.
On Mac:
- Open System Preferences.
- Select Software Update.
- Install any available updates.
Why This Fix Works
Apple may release updates that fix specific bugs related to privacy settings or network issues. Keeping your device up to date ensures it has the latest patches and improvements.
Impact: This is a simple fix that doesn’t compromise any of your privacy settings while ensuring that your device runs smoothly.
Additional Troubleshooting Tips
Sometimes, even after applying the above fixes, you may still encounter issues. Here are a few extra steps you can try:
- Switch Networks: If you’re on a public Wi-Fi or work network, try switching to a different network to see if the problem persists.
- Enable and Disable Airplane Mode: Quickly refreshing your device’s network connection can often solve minor issues. Simply toggle Airplane Mode on and off.
- Restart Your Device: A simple restart can clear temporary glitches that might be causing the error.

Anna Zoee is an experienced blogger at Macs Wind, where she shares her expertise on all things Mac-related. With a passion for technology and a knack for simplifying complex topics, Anna delivers insightful content that helps readers get the most out of their devices. Her years of blogging experience make her a trusted voice in the tech community.